DLTK's Crafts for Kids
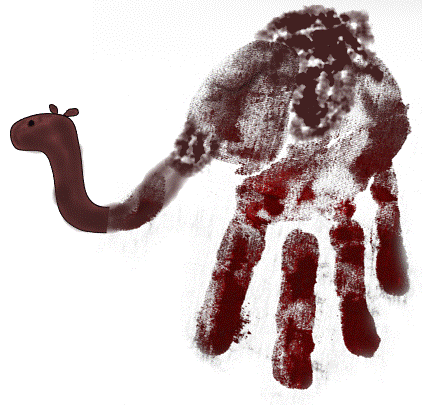
Handprint Camel Craft
 Welcome to our camel handprint craft tutorial!
This delightful and interactive activity will guide you through the process of transforming your handprint into a charming camel. With just a few simple steps, you'll be able to create a unique piece of art that showcases your creativity.
Materials:
- Brown paint
- White paper
- Paintbrush
- Water and a cloth for washing hands
Craft Instructions:
- Begin by spreading your fingers apart and applying brown paint evenly on your palm and fingers. Make sure to cover the entire surface of your hand.
- Carefully press your hand onto a white piece of paper, creating a handprint. Press down firmly to ensure that the paint transfers well onto the paper.
- Once you have made the handprint, wash your hands thoroughly to remove the paint. Dry your hands with a cloth.
- Now, turn the paper upside down so that the fingers of the handprint are pointing downward. This will serve as the legs of the camel.
- Dip a paintbrush into the brown paint, and use it to turn the thumb of the handprint into a U-shaped neck. Extend the neck upward from the top of the palm towards the fingers.
- Next, use the paintbrush to add an oval-shaped head at the top of the neck. The head should be slightly smaller than the palm of the handprint.
- On either side of the head, add two small oval ears using the paintbrush. These ears should be placed near the top of the head and slightly tilted outward.
- Paint a straight line on the back as a tail.
- Allow the paint to dry completely.
Congratulations! You have successfully created a camel handprint craft. You can further decorate the background or add details to the camel using additional art supplies if you wish. Enjoy your craft!
Print friendly version of these instructions