DLTK's Crafts for Kids
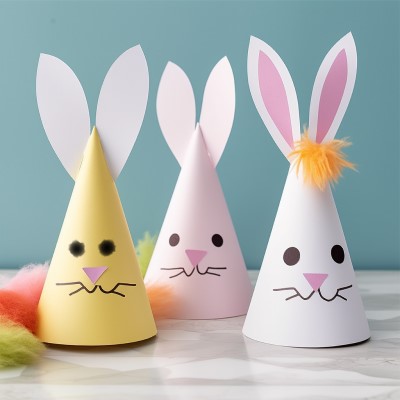
Paper Cone Bunny Basket
Add bunny ears and a face to a paper cone to make a fun and easy Easter bunny craft.

Materials:
- printer,
- something to color with,
- scissors,
- glue,
- paper
There are lots of things you can do with this craft:
OPTIONS
- attach a popsicle stick to make it a puppet,
- attach a paper handle to make a basket (this is my favorite option... put in a bit of shredded paper or tissue paper and fill with small chocolates),
- attach a string to make a cone hat (when the kids tilt their heads forward they'll look like the Easter Bunny) or
- just hang on the fridge.
 Instructions:
- Print out the template of choice or design your own.
- Color the pieces as appropriate.
- Cut the pieces out. (Cutting may require adult assistance and can be pre-done). Cut along the solid lines only!
- See the picture above if you're confused as to how to put this together. You might want to practice making the cone (without gluing) before you put the face on just so you can get a feel for what it looks like. The kids think it's pretty "magical" how the flat piece of paper turns into a cone!
- Glue or tape the ears onto the top of the bunny.
- Glue or tape the eyes and nose onto the face.
- If you look at the bottom of the half circle (the straight part), you'll see the "glue here". Glue the side to the right of the teeth to the side to the left of the teeth.
- Fold the ears and teeth on the dotted lines.
- If you're making a bunny basket put a bit of tape on the teeth so the hole stays covered. (stuffing with a bit of shredded paper or tissue paper also keeps any candy from falling out the bottom).
Templates:
- Close the template window after printing to return to this screen.
- Set page margins to zero if you have trouble fitting the template on one page (FILE, PAGE SETUP or FILE, PRINTER SETUP in most browsers).
Template (colour) or (B&W)