DLTK's Crafts for Kids
Hiking the Loop Brook Trail
The Loop Brook Trail in Glacier Park, British Columbia (BC) is the perfect type of trail for my husband Darren and I.
It’s a beautiful, forest walk (which I love) that is a pleasant challenge in parts without ever feeling dangerous. It’s also an interpretive walk with frequent signs detailing Canadian and CPR railway history (which he loves). It’940s an appropriate walk for families with children.

The first viewpoint is a short walk from the parking area.
Within five minutes from the parking lot, is the first viewing point where you can photograph the stone trestles, so if you only have a short time to stop, you can just go there and back in an easy 15 minutes (which includes time to read a few of the signs). The stop is not crowded with people. There are basic washrooms available.
The entire loop is 1.6 km and took us 1.5 hours to walk (we read all the signs and took many photos) and the trail was clearly marked throughout—there were only two instances where we really had to pause to figure out the path.
The trail is part of Rogers Pass National Historic Site and passes within touching distance of the stone trestles (stone pillars) that used to support the train tracks through the valley. The tracks looped in an S–shape, allowing the train more space to make its descent through the Rocky Mountains. The remaining stone trestles are some of the oldest man’made structures remaining in Western Canada.
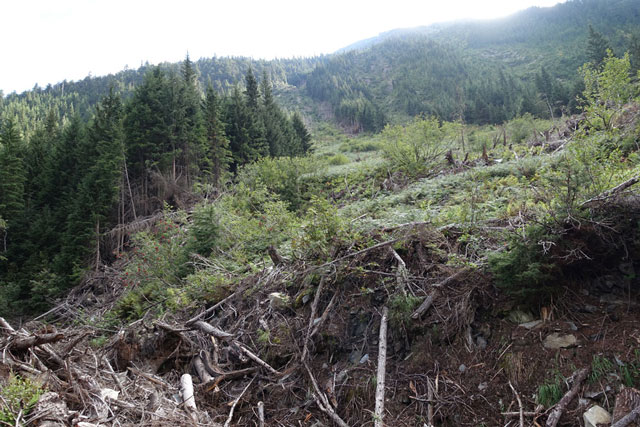
Looking up the mountains from the middle of the loop trail you can see evidence of avalances.
At the time it was built in the 1880’s, this stretch of track was an engineering marvel which was something of a tourist attraction. Wealthy passengers would ride from the east through the beautiful Rockies to experience the thrill of descending down this looping track over the fast moving waters below. By the early 1900’s it was replaced by the Spiral Tunnels but to this day, it is still interesting to walk the trail and learn about, photograph and touch the stone trestles that first allowed trains to travel from coast to coast in Canada.
What to bring:
These days, I always carry a walking stick and bottle of water. The stick can help with any short steeper sections. Water is always good to have along. My stick is simple—a branch from a poplar tree. Nothing fancy. I also wear light hiking boots (I love my boots… they keep my feet comfy). Good, practical footwear is always a good idea when you’re walking.
We live near the Rockies. We bring bear spray whenever we go for walks in the National Parks. We rarely see bears and have never had to use the spray. If you have questions about wildlife stop by one of the visitor centers. They have information about safety and maps of the area.

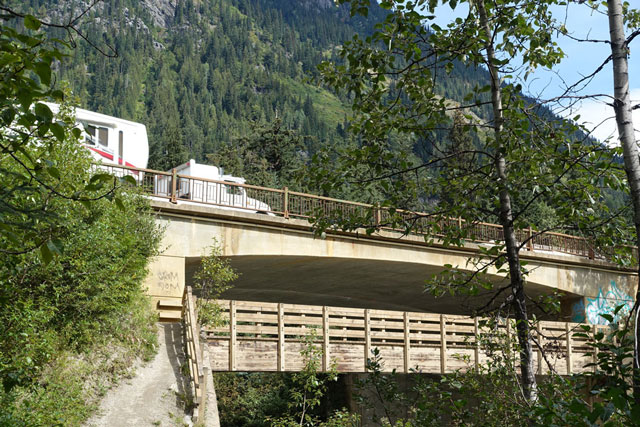
The parking lot is just east and south of the bridge. Directly across the highway from the sign of Loop Brook Campground.
Walkthrough of the Loop Brook Trail:
If travelling west (towards Vancouver), pull into the parking lot as soon as you see the sign for the campground. The parking lot is right beside the highway. There’s a second parking lot over the bridge and in a ways (remember that this trail is a loop) but my walkthrough goes from the lot beside the highway. I think it’s the better starting point as you see trestles right away and the walk is right into the forest (very pretty).
Anyways, park, use the washrooms, grab some water and read the sign right there. Then head into the forest along the trail! A minute in and you already feel the natural beauty and solitude that I LOVE!

There are a couple of interpretive signs to get you started on the Loop Brook Trail.
You start up a short incline to the first trestle viewpoint with more information and the chance to see four of the pillars over the Loop Brook.
When you’re ready to continue, give yourself a second to see the trail… it zigs a little funny but it’s easy to see (some people don’t realize it’s a trail and just go up to the viewpoint then back to their cars).

The start of the trail had very little undergrowth.
I was surprised by how barren the undergrowth was in this initial area. I’m used to ferns, fungus, mosses, bunchberry or false Solomon’s Seal filling in the ground underneath the trees’ canopy—and a little later in the hike those familiar plants and more were everywhere to be seen—but here at the start of the trail, the understory seemed strangely missing. Everywhere we looked it was just huge brown trunks towering above decaying needles and twisted roots—no green in sight until you craned your neck to look up, up into the canopy above. I still can’t decide if it was spooky or peaceful—is it possible to be both?

Take a right at the top of the incline to stay on Loop Brook Trail.
We walked about twenty minutes upwards through this ghostly forest (a fairly gentle incline) reading the signs along the way until we hit a T–intersection. To the left was a path to a nearby campground (don’t go that way) and to the right is the continuation of our Loop Brook Trail with its interpretive signs.
Take a minute to look both ways—notice how straight the trail is? That’s because you’re walking on the old railway track! If you watch the ground closely you can see the gravel that made up the old railway bed. You can also see an ‘undulation’ where the railroad ties were. Some of them are still visible, sometimes slowly decomposing, other times covered in moss. It’s quite cool and gives lots to chat about along the way.
It feels incredibly flat and road like but the mountains are pretty steep. In some parts you can see how they’ve dug and dynamited into the side of the mountain to make the track whereas in others you can see how they’ve built up the mountain to make it.
Eventually you reach an odd ‘thing’ that looks like a collapsed barn or structure. It’s a snow shed! They were (and still are) built over railways and roads in avalanche prone areas to protect the road from the avalanche. This one has been crushed *gulp*!

The old railway bed on Loop Brook Trail.
We had to take a moment around here to see the path. The original trail has disappeared under a mountain of logs. The first time we saw a scene like this, our daughter Kaitlyn asked in awe, “did beavers do this!?” Er, no… this is what an avalanche looks like after the snow has melted—it is not the work of an overachieving Castor canadenis, hehe.

Park rangers had to divert the path and clear some debris after an avalanche.
Things in nature change, but the avalanche area was quite fresh when we were there. We could see where park rangers had used chainsaws to remove trunks to clear the trail and where the stairs of the old trail had been mostly covered by logs. After a moment, we easily found where the park rangers had blazed the new trail up and around the fallen trees. The new trail is narrower but still a pleasant (though single file) walk. We agreed that it was worth the trip just to see the destructive power of an avalanche—the destroyed snow shed, the huge trees that had been snapped like twigs and the national park trail that had been buried by debris.

This pillar was undermined by a stream and toppled by an avalanche.
At the end of this avalanche area we found the second set of stone pillars with more photo opportunities. We also bumped into the only other people we were to see during our entire walk—an older couple from Germany who, like us, were awestruck by the thirty foot tall stone pillar that had fallen over on its side—nearly completely whole. It had been undermined by the nearby river and toppled by an avalanche.
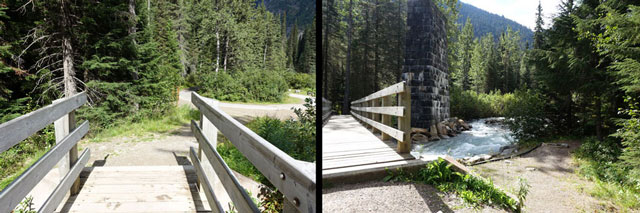
The trail continues to the left after the bridge over the river. Don't go to the parking lot.
After the second set of pillars, we had to look closely for the trail, once again. It’s another parking lot area (but not the one where we started) so it’s easy to get distracted and head off the trail towards the parking. Take a minute to look for the trail into the forest—this is the continuation of the loop that we’ve been following.

Near the end of the trail there is a road to cross.
This is the portion of the trail that I found most difficult. Partially because it was towards the end of the journey, partially because I found it the least interesting and partially because it was a bit steep. But before long we reached a road to cross and soon after that a bridge under the highway that led us right back to our Jeep. Yay! We made it, saw lots, learned lots and chatted lots. A perfect afternoon!
The pedestrian bridge at the end of the walk leads to the parking area where we started.
All photos in this blog post are copyright Darren Guenther.
 About Leanne:
Wife, mom and the woman behind the scenes of the DLTK's Crafts for Kids websites. The websites are a terrific hobby -- run by (me) Leanne, a mom with two girls as my official craft testers and my husband as my technical support. DLTK are the first initials of each of the people in my family (I'm the L!). Whenever we send out little cards or whatnot, we sign 'love DLTK' ... when I started the website I used the initials. Had I known the website would get actual strangers visiting it, I would have picked a less mysterious name but we're all stuck with it now!
You can view my other blog posts here.