DLTK's Crafts for Kids
Decoupage Words Tealight Candle Holder Tutorial
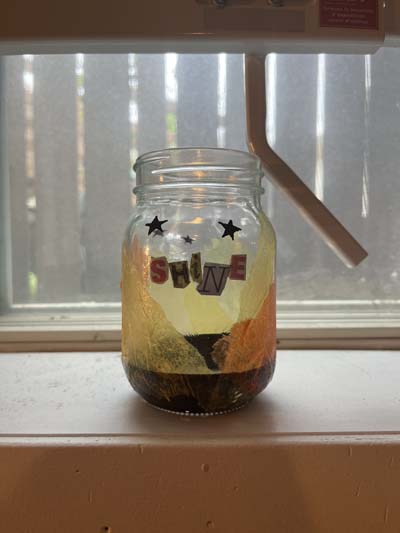 Add a warm, personal touch to your room decor with a homemade Decoupage Tealight Candle Holder.
A big thanks to my niece Sierra for sharing all the photos of her beautiful decoupage candle holder with us!
This craft project is easy to do, and the results are simply stunning. Let's go through the process step-by-step.
We decoupaged the word SHINE to our candle holder but you can pick any word you like including names.
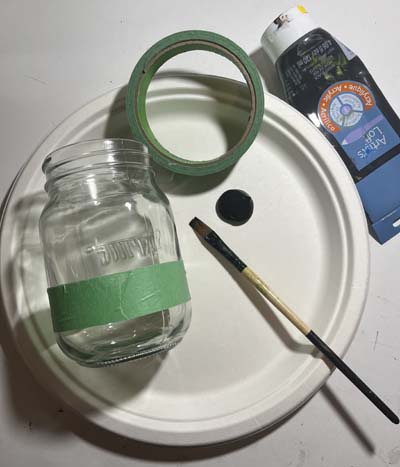
Materials:
- A glass jar
- Masking tape
- Acrylic paint (color of your choice)
- Paintbrush
- Tissue paper, magazine pages or a napkin with letters
- Decorative tissue paper (multiple colors)
- Mod Podge or white craft glue
- Scissors
- Paint pen (optional)
- Battery operated tealight
Instructions:
Step 1: Gather Your Materials
 Collect all your materials and set up a workspace where you can comfortably work. Lay out newspaper or a craft mat to protect your surface.
Step 2: Prep Your Jar
If you're reusing a jar, ensure you clean it well. Remove any labels and sticky residue. This will help the paint and Mod Podge adhere better to the jar.
Step 3: Mask Off the Bottom
 Put a piece of masking tape around the bottom fifth of the jar. This will create a clear line between the painted part and the decoupaged section of the jar. A dark bottom will also help the candle reflect. Just make sure you make the dark part fairly narrow (don't paint up too high)
Step 4: Paint the Bottom
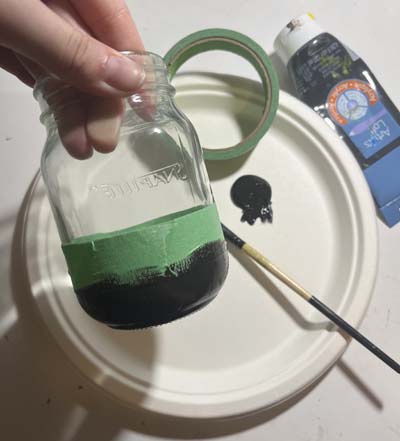 Use your selected acrylic paint to cover the area below the tape. Ensure the coverage is even and then let it dry completely. This might take a few hours.
Step 5: Attach the Letters
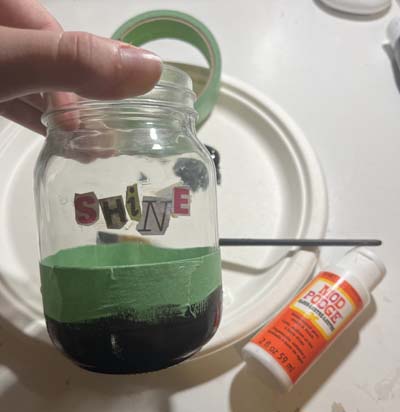 Cut out letters from tissue paper or a napkin. You might choose a meaningful word or name. Apply a layer of Mod Podge to the top half of the jar, then adhere your letters. Smooth them out gently to avoid wrinkles or bubbles.
Step 6: Seal the Letters
 Apply another layer of Mod Podge over the top of the letters. This will act as a sealant. Let it dry until it's slightly tacky, which shouldn't take too long.
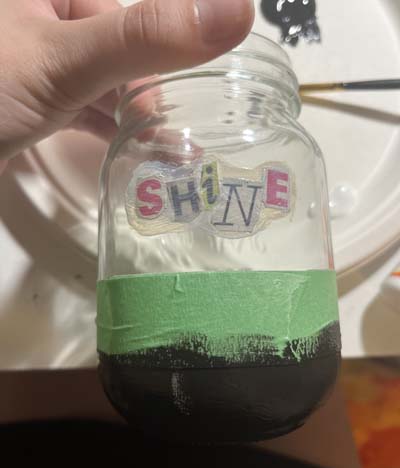
Step 7: Remove the Tape
Once the paint is thoroughly dry, carefully remove the masking tape. You should have a clean, crisp edge.
Step 8: Add Decorative Tissue Paper
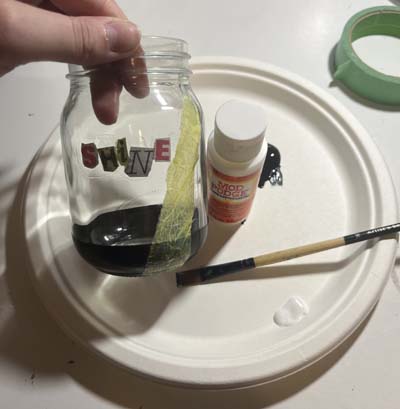 Cut your decorative tissue paper into shapes or strips. Mod Podge these to the sides of the jar, overlapping the edges and colors to create a vibrant, textured look.
Step 9: Get Creative with Colors
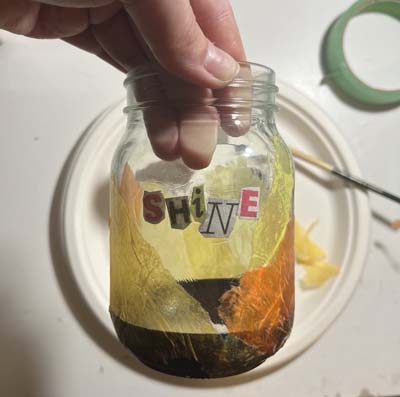 Don't stop at one color! Introduce multiple colors of tissue paper to create a captivating, kaleidoscopic effect.
Step 10: Add Detail with a Paint Pen
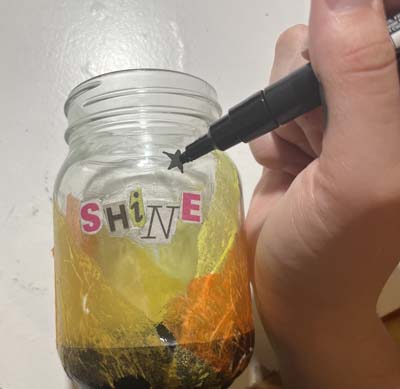 If you want to include some additional detailing, you can use a paint pen. Draw small designs like stars or hearts. This step is optional but can add a touch of whimsy to your design.
Step 11: Display Your Decoupaged Candle Holder
Once everything is dry, your Decoupage Tealight Candle Holder is ready for display. Place a battery-operated tealight inside to safely illuminate your beautiful creation. If you're displaying this in a child's room, ensure you use a battery-operated tealight for safety.
Print friendly version of these instructions.
And there you have it - a beautiful, customized Decoupage Tealight Candle Holder. This craft not only allows you to create a lovely piece of room decor but also provides an excellent opportunity to repurpose used jars.
I would say the difficulty level of this craft is beginner to intermediate (grade school children and up). It's fairly simple but requires some patience. Here are some tips for completing it successfully:
- Prepare your workspace and get your materials organized: Set up a clean and spacious area where you can comfortably work. Lay out newspaper or a craft mat to protect your surface.
- Clean the jar: If you're reusing a jar, make sure to clean it well and remove any labels or sticky residue. This will ensure better adhesion of the paint and Mod Podge.
- Mask off the bottom: Use masking tape to create a clear line between the painted part and the decoupaged section of the jar. This will help create a clean and professional-looking finish.
- Take your time with the letters: When attaching the tissue paper letters, apply a layer of Mod Podge to the jar and carefully place the letters, smoothing them gently to avoid wrinkles or bubbles. Make sure they adhere well to the jar.
- Seal the letters: Apply another layer of Mod Podge over the top of the letters to act as a sealant. Allow it to dry until slightly tacky before proceeding.
- Display your candle holder safely: Once everything is dry, place a battery-operated tealight inside the jar for safe illumination. If displaying in a child's room, ensure you use a battery-operated tealight for safety.
Remember to take your time, follow the instructions carefully, and let your creativity shine through! Enjoy the process and have fun crafting your personalized Decoupage Words Tealight Candle Holder.
Shine bright!
Leanne