DLTK's Crafts for Kids
Clutter Bug Paper Craft
 I originally made this craft for National Clutter Week (if you can believe
it). Now, it seems a bit strange to celebrate such a thing, but I figure that
anything I can use to get Tasha to clean up her toys can't be all bad! So I've
invented the clutter bug craft. In our household, the kids were allowed to do the
craft AFTER cleaning up their clutter.
I originally made this craft for National Clutter Week (if you can believe
it). Now, it seems a bit strange to celebrate such a thing, but I figure that
anything I can use to get Tasha to clean up her toys can't be all bad! So I've
invented the clutter bug craft. In our household, the kids were allowed to do the
craft AFTER cleaning up their clutter.
This craft is equally suitable for Earth Day as all sorts of odds and ends will be used (or should I say REused).
ALTERNATIVES: Brenda (one of our viewers) adds: My little ones (if you can call them little at 7 and 4 ) had finished all of their chocolate Easter eggs that were wrapped in pretty metalic foil and as usual wanted to keep the foil. We found a great use for it. We used your clutter bug and have made some with lovely shiny bodies !! Very easy for even little ones as they can tear the foil into small pieces without needing to use scissors. I cut the body out after they had glued all the bits on so the pieces didn't have to fit the edges perfectly, and then glued the body to a contrasting piece of coloured paper.
We had already used the clutter bug before. We collected loads of the wallpaper samples that you can pick up from D-I-Y stores and made a patchwork/mosaic one. That also looks great.
Materials:
- a printer,
- paper,
- scissors,
- glue,
- some clutter to paste onto the bug.
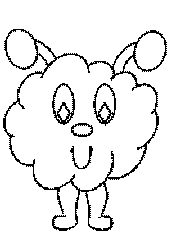
Instructions:
- Print out the template (there is no color template for this craft) and cut out the pieces.
- Color pieces if you want (we're going to glue clutter over top, so you can leave them uncoloured if you wish.).
- Paste the face, legs and antenna onto the bug.
- Find some clutter (shiny wrappers from Easter candy, bread bag tags, twist ties, cotton balls, Aluminum foil, tissue paper, old yarn, etc, etc.) and glue it onto the bug.
Templates:
- Close the template window after printing to return to this screen.
- Set page margins to zero if you have trouble fitting the template on one page (FILE, PAGE SETUP in most browsers).
Template (B&W)
Print friendly version of these instructions