DLTK's Crafts for Kids
Emoji Christmas Ornaments
contributed by Kaitlyn Guenther
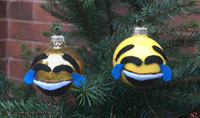
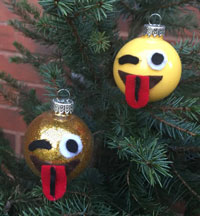
 Emojis are adorable little pictures that show emotions. Give this fun and creative holiday themed craft a try, and turn emojis into handmade christmas ornaments.
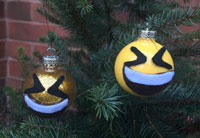
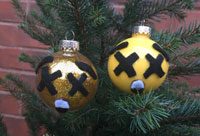
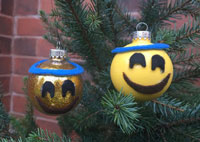
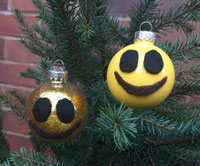
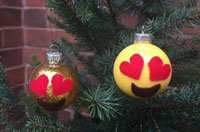
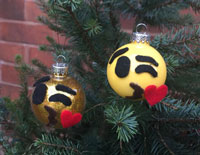
Children can decorate plain glass christmas ornaments with paint or glitter; it is so fun to watch the colours spread around the ornament. Then the emoji face can be drawn on with different markers or even things like glitter glue! If you're up for the challenge, cut the emoji face out of felt paper. These cute ornaments might be the perfect gift for family members!
There are so many ways to get creative with this project. When I was younger my sister and I always wanted a small tree of our own in our play area. If your children are anything like us, than a fun emoji themed tree may be just what they wanted this year!
Materials:
- clear glass christmas ornament—my tree is small so I got small ornaments (50 mm) but this made decorating the emoji faces more challenging, so I would recommend using larger ornaments (maybe 100mm),
- yellow paint/gold glitter,
- scissors,
- colored felt paper (depending on the faces you want to create) black, blue, brown, red, white,
- glue (I used hot glue to speed up the process but if you are working with younger kids then they should use school glue),
- string, ribbon, or thread
Instructions (Painting the Ornaments):
- Acrylic paint does not wash out of clothes, so cover up or wear old clothes. If you do get some in the clothes, work on getting it out before it dries (acrylic paint dries in less than an hour so be quick).
- ADULT: take the top off the ornament. Just tug a bit until it's out about 1/4 way. There should be two extended wires that are holding the top on. Pinch those together and the top will come out the rest of the way very easily. Set it aside (don't lose it!). The kids can do everything else.
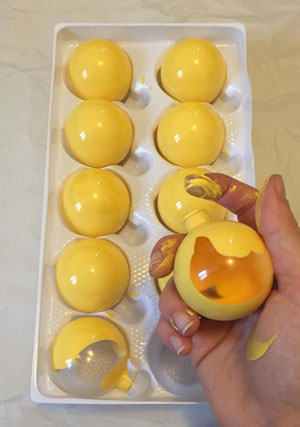 Squeeze yellow acrylic paint into the ornament. Start with a couple of squirts—you can add more if you need to.
- Turn the ornament this way and that—the paint will ooze around the ornament, coating it nice and evenly.
- When I was little I liked doing the ornaments one at a time and watching what happened. BUT, you can squirt paint into 4 or 5 ornaments and lie them on their side. Just rotate them every minute or so and they'll do the rest.
- If the paint stops oozing, squirt a bit more paint in.
- Sometimes there'll be a stubborn spot that won't cover. Use paper towel or books to prop the ornament and lie it down so the spot is on the bottom. In about 5 minutes take a peek and you should see that it's covered up. If it still hasn't covered, try giving it a gentle shake with your finger covering the open top of the ornament.
- Let the paint dry 24 hours before putting the top on (it takes awhile to dry because it isn't very exposed to the air). I just covered a cookie sheet with paper towel, put all the ornaments on it and stuck it on top of the fridge for a day.
- ADULT: put the top back on.
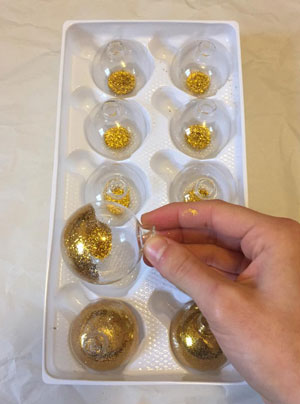 OPTIONAL: for a glitter ball use gold glitter instead of yellow paint (you can funnel the glitter into the ball with a piece of paper). The glitter coats the inside of the ornament easily if you just turn the ball this way and that. Tip the ornament upside down to get rid of any excess glitter.
Printable version of these instructions
Below are additional instructions depending on which emoji faces you want to turn into christmas ornaments.
 |
Emoji Christmas Ornaments |
 |
Emoji Christmas Ornaments |
 |
Emoji Christmas Ornaments |
 |
Emoji Christmas Ornaments |
 |
Emoji Christmas Ornaments |
 |
Emoji Christmas Ornaments |
 |
Emoji Christmas Ornaments |
 |
Emoji Christmas Ornaments |
 |
Emoji Christmas Ornaments |
 |
Emoji Christmas Ornaments |