DLTK's Crafts for Kids
Air Dry or Bake Clay
Introducing kids to crafting can be a fun and educational experience. One of the simplest, most versatile, and least expensive materials you can use is homemade salt dough clay. This dough is made with just three basic kitchen ingredients: salt, flour, and water. You can add powdered tempera paint for color, which is both safe and non-toxic.
Creating salt dough clay is an activity that combines art, science, and even a bit of math, making it a great educational tool. As children measure and mix the ingredients, they learn about ratios and the science of how materials can change. When they knead the dough and shape it, they're developing fine motor skills and tapping into their creativity.


After the creations dry, they can be painted and varnished for added effect. Whether you're looking for a rainy day activity, a fun party craft, or an educational project, making and creating with salt dough clay is a fantastic option.
If you're looking for a cooked clay option, try this one!
Materials:
- 1 cup of flour
- 1/2 cup of salt
- 1/2 cup of water (you might not need all of this)
- Optional: Powdered tempera paint (quantity as desired for color intensity)
Instructions:
 Mix together the dry ingredients: flour, salt, and optionally, powdered tempera paint for color.
- Start adding the water slowly, while stirring the mixture constantly. You're looking for a smooth consistency that is pliable but not sticky. You may not need to use all of the water.
 Once the mixture comes together, knead it on a smooth surface (like a countertop) for about 10 minutes until the dough is firm.
- Now, your salt dough clay is ready to use! You can roll it out to about 1/2 inch thickness and cut with cookie cutters, just like you would with cookies.
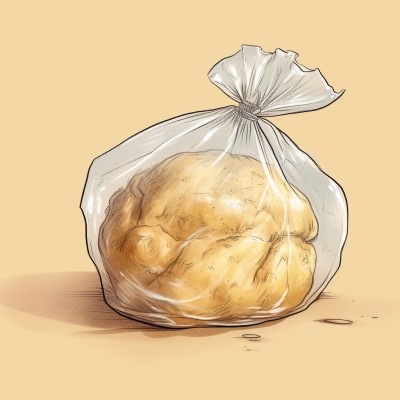 Store any extra dough in a plastic bag. It should last for up to 3 weeks.
- To dry your creations, you have two options:
- You can either leave them out at room temperature in a dry, breezy location for 48 hours.
- Or, preheat your oven to 300 degrees Fahrenheit and bake your creations on a foil-covered cookie sheet for about 30 minutes or until light brown. The drying time will vary depending on the thickness of your creations.
- Optional: Paint with acrylic or tempra paints. (acrylic cover better, but don't wash out of clothes)
- Looking for ideas on how to use your newly created air dry clay? Why not try out some clay beads, a pinch pot or a cute little clay gnome?
Remember, salt dough creations are not edible, so be sure to keep them out of the reach of pets and small children. Also, they should be stored in a cool, dry place to prevent them from absorbing moisture and becoming soft again.
Working with homemade air-dry clay is a fun and creative activity, but there are some important safety considerations to keep in mind. Here are some tips:
- Handling: Always wash your hands thoroughly before and after working with clay. This will help to prevent any irritation from the clay and to remove any residue that could get on your clothing or other surfaces.
- Non-Toxic: Ensure the clay recipe you're using is non-toxic, especially if children are involved. Typical homemade clay recipes involving flour, salt, and water are generally safe, but always double-check.
- Supervision: If children are using the clay, always supervise their work. This is to ensure they don't put the clay in their mouths or leave it where small children or pets might ingest it.
- Use Appropriate Tools: When shaping and carving the clay, use age-appropriate tools. For younger children, plastic clay tools are best. Older children and adults can use more advanced tools, but always exercise caution to avoid injuries.
- Storage: Store your clay in a sealed container when it's not in use to keep it from drying out. It's also important to store it out of reach of small children and pets.
- Ventilation: While homemade air-dry clay is generally safe, it's still a good idea to work in a well-ventilated area, particularly if you're sensitive to dust.
- Dust and Debris: When the clay dries, it can produce dust. Avoid breathing in this dust by not sanding or scraping the dry clay indoors or in an enclosed space.
- Disposal: Dispose of any unused clay properly. Do not throw it in a sink or toilet, as it could cause clogs. Instead, throw it in the trash or consider composting it if it's made from organic materials.
- Final Product: Remember that air-dry clay isn't food safe or waterproof. It's best for decorative items and crafts. If you want to make it water-resistant, you can seal it with a water-based sealant.
- Allergies: If you have allergies, especially to wheat or gluten, be aware that many homemade clays are made with flour. You might need to look for alternatives or take precautions to avoid a reaction.
Remember, the most important part of crafting is having fun. As long as you follow these safety tips, you can enjoy creating with your homemade air-dry clay.
Happy crafting!
Leanne
Print friendly version of these instructions.
