DLTK's Crafts for Kids
How to Cross Stitch
This is a children's craft website and with that in mind the patterns and directions are geared to those learning to cross stitch. Having said that, beginners of any age may find the info handy!
Note! Framing ideas (bottom of this page)
Pattern: Kids can use graph paper to design their own patterns or they can check out one of the free beginner cross stitch patterns on my website.
Holidays and Seasons
Animals
Fabric to Use: My grandma is far from a beginner cross stitcher and can use any linen for cross stitching. But for those of us at a less advanced stage, the most common material used is called "Aida cloth". Aida cloth comes in a number of different sizes. For example 8 count Aida cloth has 8 cross stitches per inch while 16 count has 16 cross stitches per inch. A beginner should use the LOWEST number Aida cloth they can find -- my 10 year old daughter (a beginner) uses the 6 count Aida cloth (8 count when we can't find any 6).
Keep in mind, the size of your finished project also depends on the count you use. If the pattern is on a 50x40 grid, a 6 count Aida cloth will give you an 8.3x6.7 inch finished work while an 8 count Aida cloth will result in a 6.25x5 inch piece. You'll want to add two to three inches all around for framing.
For even younger children (my 6 year old, for instance) the plastic canvas needlepoint material is the best option. In this case you don't need an embroidery hoop, you can use wool instead of embroidery floss and you'll find it much easier to "aim" your needle at the right spot. This plastic canvas is a terrific starter material for cross stitch!
Embroidery Floss: This is the thread you use for stitching. It comes with 6 threads wrapped together. Cut about an 18 inch piece off and unravel the thread so you're using 3 threads for your cross stitching or 1 thread for your backstitching -- this applies to all our beginner projects. If you're using a higher numbered Aida cloth (18 or up) use 2 threads for your cross stitching instead of 3.
Embroidery Hoop: If you visit this site a lot, you know I'm not a big proponent of buying things (I like recycling and cutting back on expense when crafting with kids). But you can't cut out the embroidery hoop (4" ones work well)! Trying to cross stitch without one will just result in failed attempts and frustration. Borrow from grandma, pick up at a garage sale or buy brand new... But make sure you have one before your child (or you) starts trying to cross stitch. Remove projects from the hoop when you aren't working on them to avoid leaving marks. The smaller piece goes on the wrong side of the project with the large piece overlapping on the right side.
Embroidery Needle: A 22 or 24 needle work well... Realistically,
just find a needle that you can thread 3 pieces of embroidery floss into without
too much trouble!
Making Your Project:
Edges: Purchase Aida cloth with about 3 inches extra around the sides. Put masking tape around all of the edges to prevent fraying.
Find the Center: Fold the cloth lengthwise and widthwise and crease. The point in the middle is the center. Start stitching as near the center as makes sense (given your pattern) as possible. There are arrows on the patterns that indicate the center. When you put your embroidery hoop onto your cloth, do it so the center is showing.
Starting Out: When you start your thread out, leave a 2 inch length dangling on the wrong side of your fabric (you don't need to tie a knot in the end). When you continue with more stitches, catch the 2 inch length under the stitches on the back of your project. This is called anchoring the thread.
![]() back side of project
back side of project
Making the Pattern: You can do this two ways (it depends a lot on whether you're changing colors of thread or not). The best way if you don't need to change colors for awhile is to do a long row of half stitches (/ / / / /) and when you've finished them work backwards to complete the cross (\ \ \ \ \). Ultimately, this method results in a more uniform stitch and seems to go a bit faster. If, on the other hand, you are changing colors a lot, you can stitch an individual X each time).
Just make sure you always work your stitches the same way... You can start with \ \ \ \ or with / / / / but don't start one row \ \ and the next row / /.
Backstitching: Not done for every project. This is done at the end of the project. It is a running stitch not a X that outlines the pattern. When reading the pattern, the backstitching is typically shown by a solid line and is sometimes done in a color different (slightly darker) than the cross stitching.
With a beginner cross stitcher, I skip the backstitching (unless they're already familiar with how to do it) and just focus on the cross stitch. I find it takes my10 year old longer to backstitch her projects than it does to cross stitch them, so we're just sticking to the cross stitch for now.
Here's how it's done, though...

 backstitch: up at one, down at two; up at 3, down at 4
Framing/Display:
So! You've finished off a beautiful masterpiece and want to display it... Here are some ideas:
Bookmarks - any of the smaller -- long, narrow projects can be used as bookmarks:
- Fold the unfinished edges over and hot glue onto the back side of the project.
- Cut a piece of card stock, poster board, thin cardboard or felt to the same size or a smidge larger than your project.
- Hot glue this onto the back side of the project, covering the unfinished edges and wrong side of the work.
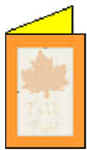
Cards - any of the smaller rectangular or square projects can be made into greeting cards.
 Fold the unfinished edges over and temporarily
pin onto the back side of the project
Fold the unfinished edges over and temporarily
pin onto the back side of the project- Fold a piece of card stock in half (in our diagrams, the orange is the front and the yellow the inside so it's easier to follow along, but cardstock is typically the same color on both sides).
 Lightly trace your cross stitch project onto the inside the folded
cardstock
Lightly trace your cross stitch project onto the inside the folded
cardstock- try to make sure it's centered.
- if you'd like to print a title on your card, you can squiggle the project down a bit to leave room.
 set aside your cross stitch
- Use an exacto knife to cut a hole out of your card stock where you traced... just in the half you did your tracing, not through both sides.
 Unpin the unfinished edges
of your cross stitch and flatten back out again.
Unpin the unfinished edges
of your cross stitch and flatten back out again.- Use double sided tape, masking tape or hot glue to glue your cross stitch inside the folded cardstock "card" so the project is peeking out of the hole you cut. (This will be the front of your card).
 Fold a second piece of card stock in half (either the same color or
a complimentary color).
Fold a second piece of card stock in half (either the same color or
a complimentary color).- Use hot glue or double sided tape to glue it inside the first piece of card stock (so the cross stitch is sandwiched in there).
- Print a message inside your card and/or on the front!
Framed Picture: any of the projects can be finished this way.
- The simplest thing is to purchase a picture frame and some matting material. Use masking tape to attach the project to the matting and then put it in the frame.
- For a home made version, we do much the same thing as we do with the greeting cards:
- Fold the unfinished edges over and temporarily pin onto the back side of the project
- Lightly trace your cross stitch project onto the back of a piece of cardstock, poster board or fun foam which you've cut to the size you want your finished frame to be.
- try to make sure it's centered
- Use an exacto knife to cut a hole out of your card stock where you traced
- Unpin the unfinished edges of your cross stitch and flatten back out again
- Use double sided tape, masking tape or hot glue to glue your cross stitch onto the cardstock so the project is peeking out of the hole you cut.
- Use hot glue or double sided tape to glue a second piece over the back of the first (so the cross stitch is sandwiched in there)
- You can decorate your frame with puffy paint, sequins, cut outs, etc but try not to make it too "busy"... You want your cross stitch to take center stage!
- Hang on the wall or refrigerator.
Pillow: any of the more square shaped projects can be finished this way.
- When you're finished cross stitching, simply cut out a piece of fabric the same size as your finished cross stitch
- Pin the fabric and cross stitch with right sides together
- Sew around three sides of the project leaving a 1/4 to 1/2 inch seam allowance (use a sewing machine or hand stitching
- Remove your pins.
- Flip your pillow right sides out
- Stuff pillow with pillow stuffing (for small pillows, add a bit of lavender, chamomile, cinnamon or pot pouri to make a smelly pillow for inside a linen cupboard).
- Sew up the last side of the pillow
- Note: keep in mind that these are beginner projects... Feel free to spice things up by adding borders, ruffles or piping to your pillow if you're at a more advanced level.