DLTK's Crafts for Kids
Spring Nail Designs
I'm not a very fancy person but I love my fingernails. They grow long without much work and they're fun to decorate so I was thrilled when my nieces came to me with an idea for the website about fingernail polish.
Little did I know how intricate polish has gotten since I was a pre-teen looking forward to her next sleepover party. We've apparently come a long way in 40 years -- from simply using a 'wild' new polish colour like purple or yellow on our nails to full on designs with dots and squiggles galore.
I truly love seeing all of their designs and I feel connected when thinking about the two of them painting each others nails for this post!
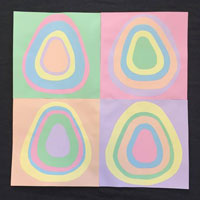
 Easter Eggs
Materials:
- Nail polish (any colours you want)
- Toothpicks
- Q-tips
Instructions:
 Choose what colour (or colours) you want for the base of your nails and make sure they are dry.
 - Use the tooth picks and q-tips to create stripes, polka dots, or a chevron pattern… have fun! Here is an example of how ours turned out.
 Diagonal Colours
Materials
- Nail polish (2 or more colours)
- Scotch tape
Instructions:
 Start with a base coat and make sure it dries completely; then, place tape on some (or all) of your nails diagonally.
 Paint a second colour of nail polish onto the part of the nail without tape.
- Allow this last colour to dry and then remove the tape. Feel free to touch up if needed.
Print friendly version of these instructions