
DLTK's Crafts for Kids
Kangaroo Three Dimensional Paper Model
This is one of the more complicated crafts on the DLTK websites, but it provides a good introduction to the fun and time consuming hobby of paper modeling.
Materials:
- printer,
- something to color with (B&W version),
- scissors,
- glue (I like glue sticks better, my daughter prefers school glue... Both work fine)
- paper
Instructions:
- Print out the template of choice (B&W or colour).
- Color (where appropriate) and cut out the template pieces.
- Piece 1 - the Body
- Fold on all the dotted lines.
- Put a dab of glue on each of the tabs.
- Gently push the body together. You can use a pencil or finger to push the tabs firmly against the edges.


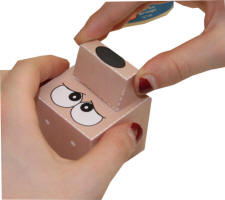
- Piece 2 - the Head
- Fold on all the dotted lines.
- Put a dab of glue on each of the tabs.
- Gently push the head together attaching the tabs. This will form a cube. Glue the head to the top of the body.


- Piece 3 - the Tail
- Fold on all the dotted lines.
- Put a dab of glue on each of the tabs.
- Gently push the tail tip up (you may want to put a bit of glue in between the two parts of the tail). Attach the tail to the back of the body.


- Piece 4 - Muzzle, Ears and Arms
- Fold the muzzle on all the dotted lines, put glue on the tabs and gently push together. Glue it onto the front of the face.
- Fold the ears in half and glue so they are coloured on both sides. Use the tabs to glue them on the top of the head.
- Fold the arms in half and glue so they are coloured on both sides. Glue them onto the sides of the body.


- Piece 5 - Pouch and Joey
- Glue the pouch onto the front of the kangaroo's body.
- Roll the Joey's head into a cone. Use the tab from the pouch to attach the Joey to the kangaroo.
- And you're done!


Templates:
- Close the template window after printing to return to this screen.
- Set page margins to zero if you have trouble fitting the template on one page (FILE, PAGE SETUP or FILE, PRINTER SETUP in most browsers).
Template 1 (color) or (B&W)
Template 2 (color) or (B&W)
Template 3 (color) or (B&W)
Print friendly version of these instructions