 DLTK's Crafts for Kids
Hen (Chicken) Paper Mache Craft
This is a relatively easy paper mache project that uses a balloon as the base. The project can be filled with candy and made into a pinata, a "piggy bank" or it can just be used as a decoration.
Materials:
- 1 balloon
- tape
- newspaper ripped into strips
- flour
- glue,
- scissors.
- white tissue paper
- white paint and paintbrush
- red, white and orange construction paper or cardstock
- Optional: large wiggly eyes
 Instructions:
- Read the tips to paper mache for how to make paste and tricks on maching.
- Blow up one balloon all the way.
 Cover the entire
bird with 2 layers of paper mache. You MUST do this in one sitting -- if you half mache a balloon it will pop when the mache starts to dry.
Cover the entire
bird with 2 layers of paper mache. You MUST do this in one sitting -- if you half mache a balloon it will pop when the mache starts to dry.- Let the project dry completely (12 to 24 hours depending on your humidity level). You can put a fan near it to speed up the drying.
 If making a pinata:
- Cut an opening in the top of the bird. (Use a damp cloth to soften the mache if you have trouble cutting the opening).
 Fill with candy or small toys.
- Add a string or rubber band that is attached to the inside of the bird -- make sure you attach it inside but don't let it completely disappear when you paper mache (you'll use this string or rubber band to hang up your pinata).
- Tape shut.
- Once dry, cover the entire bird with 1 or 2 more layers of paper mache. I like to use scrap white paper or paper towel for this layer since it's easier to decorate. Don't let the paper mache get too wet or it may start to soak the project and cause it to crush. If this starts to happen, stop, let it dry (use a fan to speed up the process if you like) and then continue.
 Let the project dry completely (12 to 24 hours depending
on your humidity level). You can put a fan near it to speed up the drying.
Let the project dry completely (12 to 24 hours depending
on your humidity level). You can put a fan near it to speed up the drying.- If making a piggy bank, use scissors of a sharp knife to cut a slit at the back of the head (toward the top of the chicken, but in the back of the head not on the face). Again, you may need to soften with a damp cloth to make the cut. When you're completely finished the craft, you may have to reopen this slit, but it should be much easier if you pre-make it at this stage.
 Paint the project white and let dry.
- Cut 'petal' shapes from white tissue paper - you can fold the tissue paper multiple times so that one cut makes a bunch of feathers. The smaller you cut the teardrops the longer the project will take, so don't make them too small.
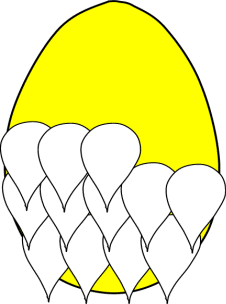 Glue the tissue paper
'petals' onto the bird starting at the bottom and working toward the head.
Glue the tissue paper
'petals' onto the bird starting at the bottom and working toward the head. Cut a heart shape out of a
piece of red construction paper or cardstock. Fold it about half way up the heart and then make a cut from the tip of the heart to
the fold. Use these cut 'tabs' to glue the heart onto the top of the chicken's head as a 'comb'.
Cut a heart shape out of a
piece of red construction paper or cardstock. Fold it about half way up the heart and then make a cut from the tip of the heart to
the fold. Use these cut 'tabs' to glue the heart onto the top of the chicken's head as a 'comb'. Cut a diamond out of orange
construction paper or card stock and fold twice near the center to make a 'beak'. Glue the beak to the bird
Cut a diamond out of orange
construction paper or card stock and fold twice near the center to make a 'beak'. Glue the beak to the bird- You can add another small red heart underneath of the beak (upside down) as the wattle of the chicken.
- Add wiggly eyes or make paper eyes.
 Cut out two simple wing shapes from white
construction paper or cardstock and glue them to the sides of the bird.
Cut out two simple wing shapes from white
construction paper or cardstock and glue them to the sides of the bird.- You can add simple feet cut from orange construction paper or cardstock if you like.
Print friendly version of these instructions