Shapes Horse Paper Craft -
Shapes, Scissor Skills, Colors, and Counting Practice
 Contributed by
Leanne Guenther
Contributed by
Leanne Guenther
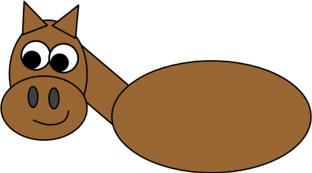
This horse craft can be used to teach preschoolers a variety of skills. You don't have to use all the thoughts for lessons... just choose the ones you're working on with your child.
The horse also works well for a farm theme, cowboys theme and Chinese New Year, Year of the Horse.
Materials:
- scissors,
- glue,
- printer,
- paper
Thoughts for Lessons:
SCISSOR SKILLS:
- This craft has lots of ovals, rectangles and triangles to cut out -- good scissor practice!
- You can precut the template into separate pieces (roughly) to make it a bit easier for beginning crafters to cut out the circles.
SHAPES:
- Separate the circles, triangles and rectangles.
COLORS:
- If using the black and white template, you can have some fun with the kids mixing shades of brown. Start with red, yellow and blue paint.
- Instruct them to mix red and blue to make purple. Set that aside for a moment.
- Now put a fair bit of yellow on your tray (I use margarine container lids for paint mixing). Slowly add purple until you have the shade of brown you like.
- Give the children white and black paint. Now you can teach three new color vocabulary words!
- "Tint" - changing a color by adding white to it. A tint is always lighter than the original color. Try using a tint of brown for the body and head.
- "Shade" - changing a color by adding black to it. A shade is always darker than the original color. Try using a shade of brown for the mane and tail.
- "Tone" - changing a color by adding grey to it (or by adding black and white). They can be darker or lighter than the original color, depending on how much black or white are used. Try using tones of brown for the hooves and the legs.
SIZES:
- Have the children sort the shapes from largest to smallest.
COUNTING:
- Count the ovals, count the rectangles and count the triangles.
Assembly Directions:
 Glue the
neck rectangle onto the largest oval so it sticks up at an angle.
Glue the
neck rectangle onto the largest oval so it sticks up at an angle.
-
Glue
the head oval onto the neck.
- Glue the snout oval onto the head.
-
 Glue the small circle eyes
onto the head.
Glue the small circle eyes
onto the head. - Glue the small triangle ears onto the top of the head.
-
 Glue the
hair onto the head.
Glue the
hair onto the head. - Glue the three larger triangles along the neck. These triangles become the horse's mane.
-
 Glue the
four skinny rectangles onto the bottom of the body. These are the legs.
Glue the
four skinny rectangles onto the bottom of the body. These are the legs. -
 Glue the
four squares - one onto the bottom of each leg. These are the hooves (feet).
Glue the
four squares - one onto the bottom of each leg. These are the hooves (feet). - (squares are a type of rectangle with all four sides identical)
- Glue the tail onto the back of the horse to finish off your
horse!
Templates:
- Close the template window after printing to return to this screen.
- Set page margins to zero if you have trouble fitting the template on one page (FILE, PAGE SETUP or FILE, PRINTER SETUP in most browsers).
Template (color) or (B&W)
Print friendly version of these instructions