DLTK's Crafts for Kids
Fish Birthday Cake
 You can use this cake for fish or ocean themed birthday parties.
This makes a nice BIG cake! It would serve 15 to 20 children. But, if you feel like you won't have enough, you can make some cupcakes, frost them blue and put them near the fish as "bubbles".

This also gives you the opportunity to make the cupcakes in a different flavour from the main cake so your guests have an option.
Click here for more photos of the process.
Materials:
- something to set the cake on -- we make our own cake boards by duct taping sheets of thick cardboard together (we usually use box lids from computer paper for this) -- this was daddy's part of the process. We then covered with Aluminum foil (you could also cover with a waxy or shiny gift wrap). We've also covered large cutting boards with gift wrap on occasion to act as a cake board.
- Two round cake pans.
- 1 cake mix (whatever flavour/recipe you prefer).
- 3 containers of white icing. You'll likely have icing left over, but I like to make sure I have enough.
- Food colouring - you can make your fish any color you like! Doing it all a single color is easier than using a different color for the fins and tail. I recommend using a single color if you're new to cake making!
- An oreo cookie OR a large marshmallow and a dark coloured jellybean (for the eye)
Instructions:
- Bake your cake according to package directions
Kimberly adds the following tip: "P.S. I found it easier to remove the cake in one piece from the pan when I buttered the bottom of the pan and sprinkled on flour before putting the batter in." - This isn't a very difficult cake, but if you're nervous, put the cakes into the freezer for a few hours. They shouldn't be frozen solid, but 3 or 4 hours in the freezer make cutting and frosting the cakes a bit easier.
 If your cake has a bulging center, trim it a bit so it's flat on top (I
usually have to trim the round cakes.).
If your cake has a bulging center, trim it a bit so it's flat on top (I
usually have to trim the round cakes.).- Turn the cake out onto a piece of Aluminum foil.
- Make sure you run a knife around the edges first so there's nothing sticking.
- Print out the template pieces from this website (or you can just estimate it if you prefer) -- depending on your printer, the size of the template may not match exactly with the cake but it will be close enough to cut out the shapes.
 Cut out the template pieces.
CAKE 1:
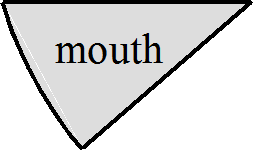
- Cut a small mouth shaped wedge from the first cake (there's a picture on the template that you can just lay on the cake and use to cut out.
 CAKE 2:
- Other than the mouth, lay all the template pieces onto the second cake.
- Cut out the tail first, then cut out the bottom fin and top fin from the wedge left over from the tail.
- All of the "grey pieces" from the template are left over cake.
- Arrange the pieces to form a fish with a tail, top fin and bottom fin.
- Add food colouring to your icing -- I like to color ALL of it at once as I find it difficult to match the color if I run out of icing. If you're using two colours, make two jars of icing your main color and the third jar your fin/tail colour.
- Ice the cake with the coloured icing.
- You can use the icing to fill in any gaps there may be between the cakes if you didn't get your lines perfectly straight.
- Take a large marshmallow and cut it in half. Use a rolling pin to
flatten it a little bit and place it on your fish as an eye. Cut a
jellybean or gummy candy in half and place it on the marshmallow as an
eyeball.
OR  Place an oreo cookie on the fish as an eye.
OR- Use white icing to draw an eye and add a small candy for the center of the eye.
- You can pipe on stripes or dots, add candies or jellybeans in "rainbow fish" patterns or use "fruit by the foot" to make stripes.
Template
Print friendly version of these instructions