<BACK
Hello Kitty Birthday Cakes
 Welcome to Kaitlyn's 4th birthday! *grin* I decided to do
something a bit simpler than the
Blue's Clues project I did last year.
Welcome to Kaitlyn's 4th birthday! *grin* I decided to do
something a bit simpler than the
Blue's Clues project I did last year.
Materials:
- one cake mix - it doesn't matter what flavour... You can make your favorite scratch cake if you're so inclined
- one or two containers of white icing (or you can make your favorite kind)
- 9x13 rectangular cake pan
- yellow decorator gel (or 1 yellow jelly bean)
- brown or black decorator gel (or 2 black jelly beans)
- red "fruit by the foot" (fruit rollup type product).
Instructions:
- Bake your cake according to package directions
Kimberly adds the following tip: "P.S. I found it easier to remove the cake in one piece from the pan when I buttered the bottom of the pan and sprinkled on flour before putting the batter in." - Let cool (I did this the night before and didn't really let it cool enough... It really should be completely cool before you start)
- If your cake has a bulging center, trim it a bit so it's flat on top (this shouldn't be a huge problem in the 9x13 rectangular pans... I didn't have to trim mine
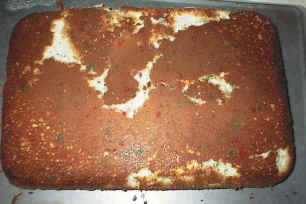
- Turn the cake out onto a piece of Aluminum foil.
- This is easier than it sounds!
- Make sure you run a knife around the edges first so there's nothing sticking.
- You'll notice from my lovely photo that my cake stuck and tore a bit.
- just pieced it back together as best I could... It didn't seem to hurt anything.
 If you have time to leave it sit for 24 hours at this point, that's your best bet (it's
less crumby if you do).
If you have time to leave it sit for 24 hours at this point, that's your best bet (it's
less crumby if you do).
I, of course, did not have time for this -- I'm sure Martha would have.- Tip from a viewer:
"Instead of just leaving it sit for 24 hours that if you freeze your cake it is much easier to ice and you can just brush crumbs off. " Thanks for the advice Amber! - Cut out the template pieces and arrange them on your cake.
- Use toothpicks to hold the template in place (poke them through the paper into the cake)
- Cut around the template pieces with a sharp knife. Be nice and smooth about it (I did it with the point of the knife).
- This is actually an easy cake to do freehand (without the template) It's just a big oval with a couple of ears.
- Remove the template from the cake.
- Remove all the scraps and put them aside (try not to rip the cake when you're removing the scraps).
- Arrange the cake on a covered board (we used our cutting board and just covered it with Aluminum foil). Make sure all the pieces are touching properly.
- Spread white icing on the cake (I've read that you're supposed to do the sides first, but I always start with the top).
- I added about 1 1/2 Tbsp of milk to the one can store bought icing to make it a bit easier to spread. Julieanne adds that if you add 1 to 2 Tbsp of corn syrup instead of milk that the icing will spread much better and you won't get as many crumbs!
- If you get crumbs on your knife, get a new knife (it sounds simple, but it took me awhile to realize how helpful it would be to switch knives when they got crumby).
- Use jelly beans or decorator gel to add two eyes and one nose (she doesn't have a mouth).
- Tie the fruit by the foot into a bow and place it over the ear.
Templates:
- Close the template window after printing to return to this screen.
- Set page margins to zero if you have trouble fitting the template on one page (FILE, PAGE SETUP or FILE, PRINTER SETUP in most browsers).
Template 1
Template 2
Template 3