DLTK's Crafts for Kids
DIY "Mom's Garden Rocks" - A Personalized Craft Gift for Mom
 Bring a personalized touch to mom's garden with this crafty, heart-warming DIY project. Making "Mom's Garden Rocks" is a great way to engage your creativity and give your mom a gift that's as unique as she is. This project involves mod podging flowers, fruits, or vegetables onto rocks, and writing a heartfelt message on a larger rock. They're not only fun and easy to create but also add an element of charm to any garden setting. Let's dive in!
Materials:
 Several rocks of varying sizes (smooth ones are best)
- Mod Podge (outdoor formula is preferable for durability)
- Paintbrush
- Scissors
- Flower, fruit, or vegetable images (cut from napkins, catalogs, or printed)
- Paint pens (for lettering)
- Clear outdoor sealant (to weatherproof your designs)
Instructions:
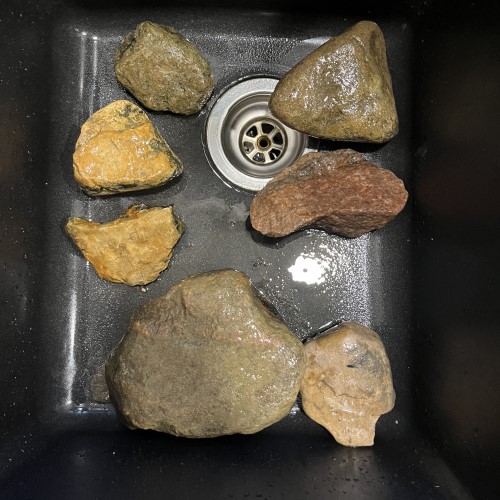 Clean the Rocks: Start by washing the rocks thoroughly to remove any dirt or debris. Allow them to dry completely before you start the project.
- Cut Out Your Images: Using your scissors, cut out the flower, fruit, or vegetable images that you want to mod podge onto your rocks.
- Optional: Paint a background color onto the rock.
- Apply the Mod Podge: Using your paintbrush, apply a thin layer of Mod Podge to the rock where you want to place your cut-out image.
 Place Your Images: Carefully place the cut-out image onto the Mod Podge-covered rock. Smooth out any wrinkles or bubbles with your fingers.
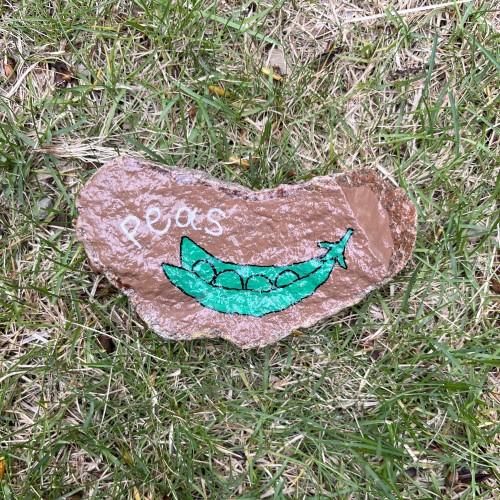
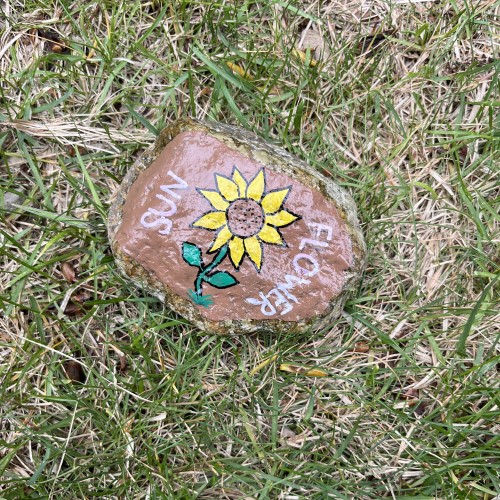
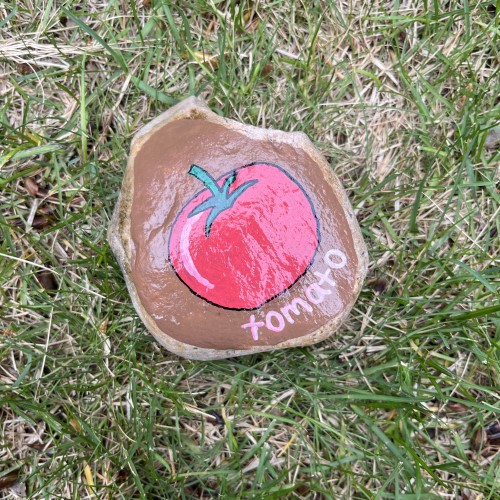
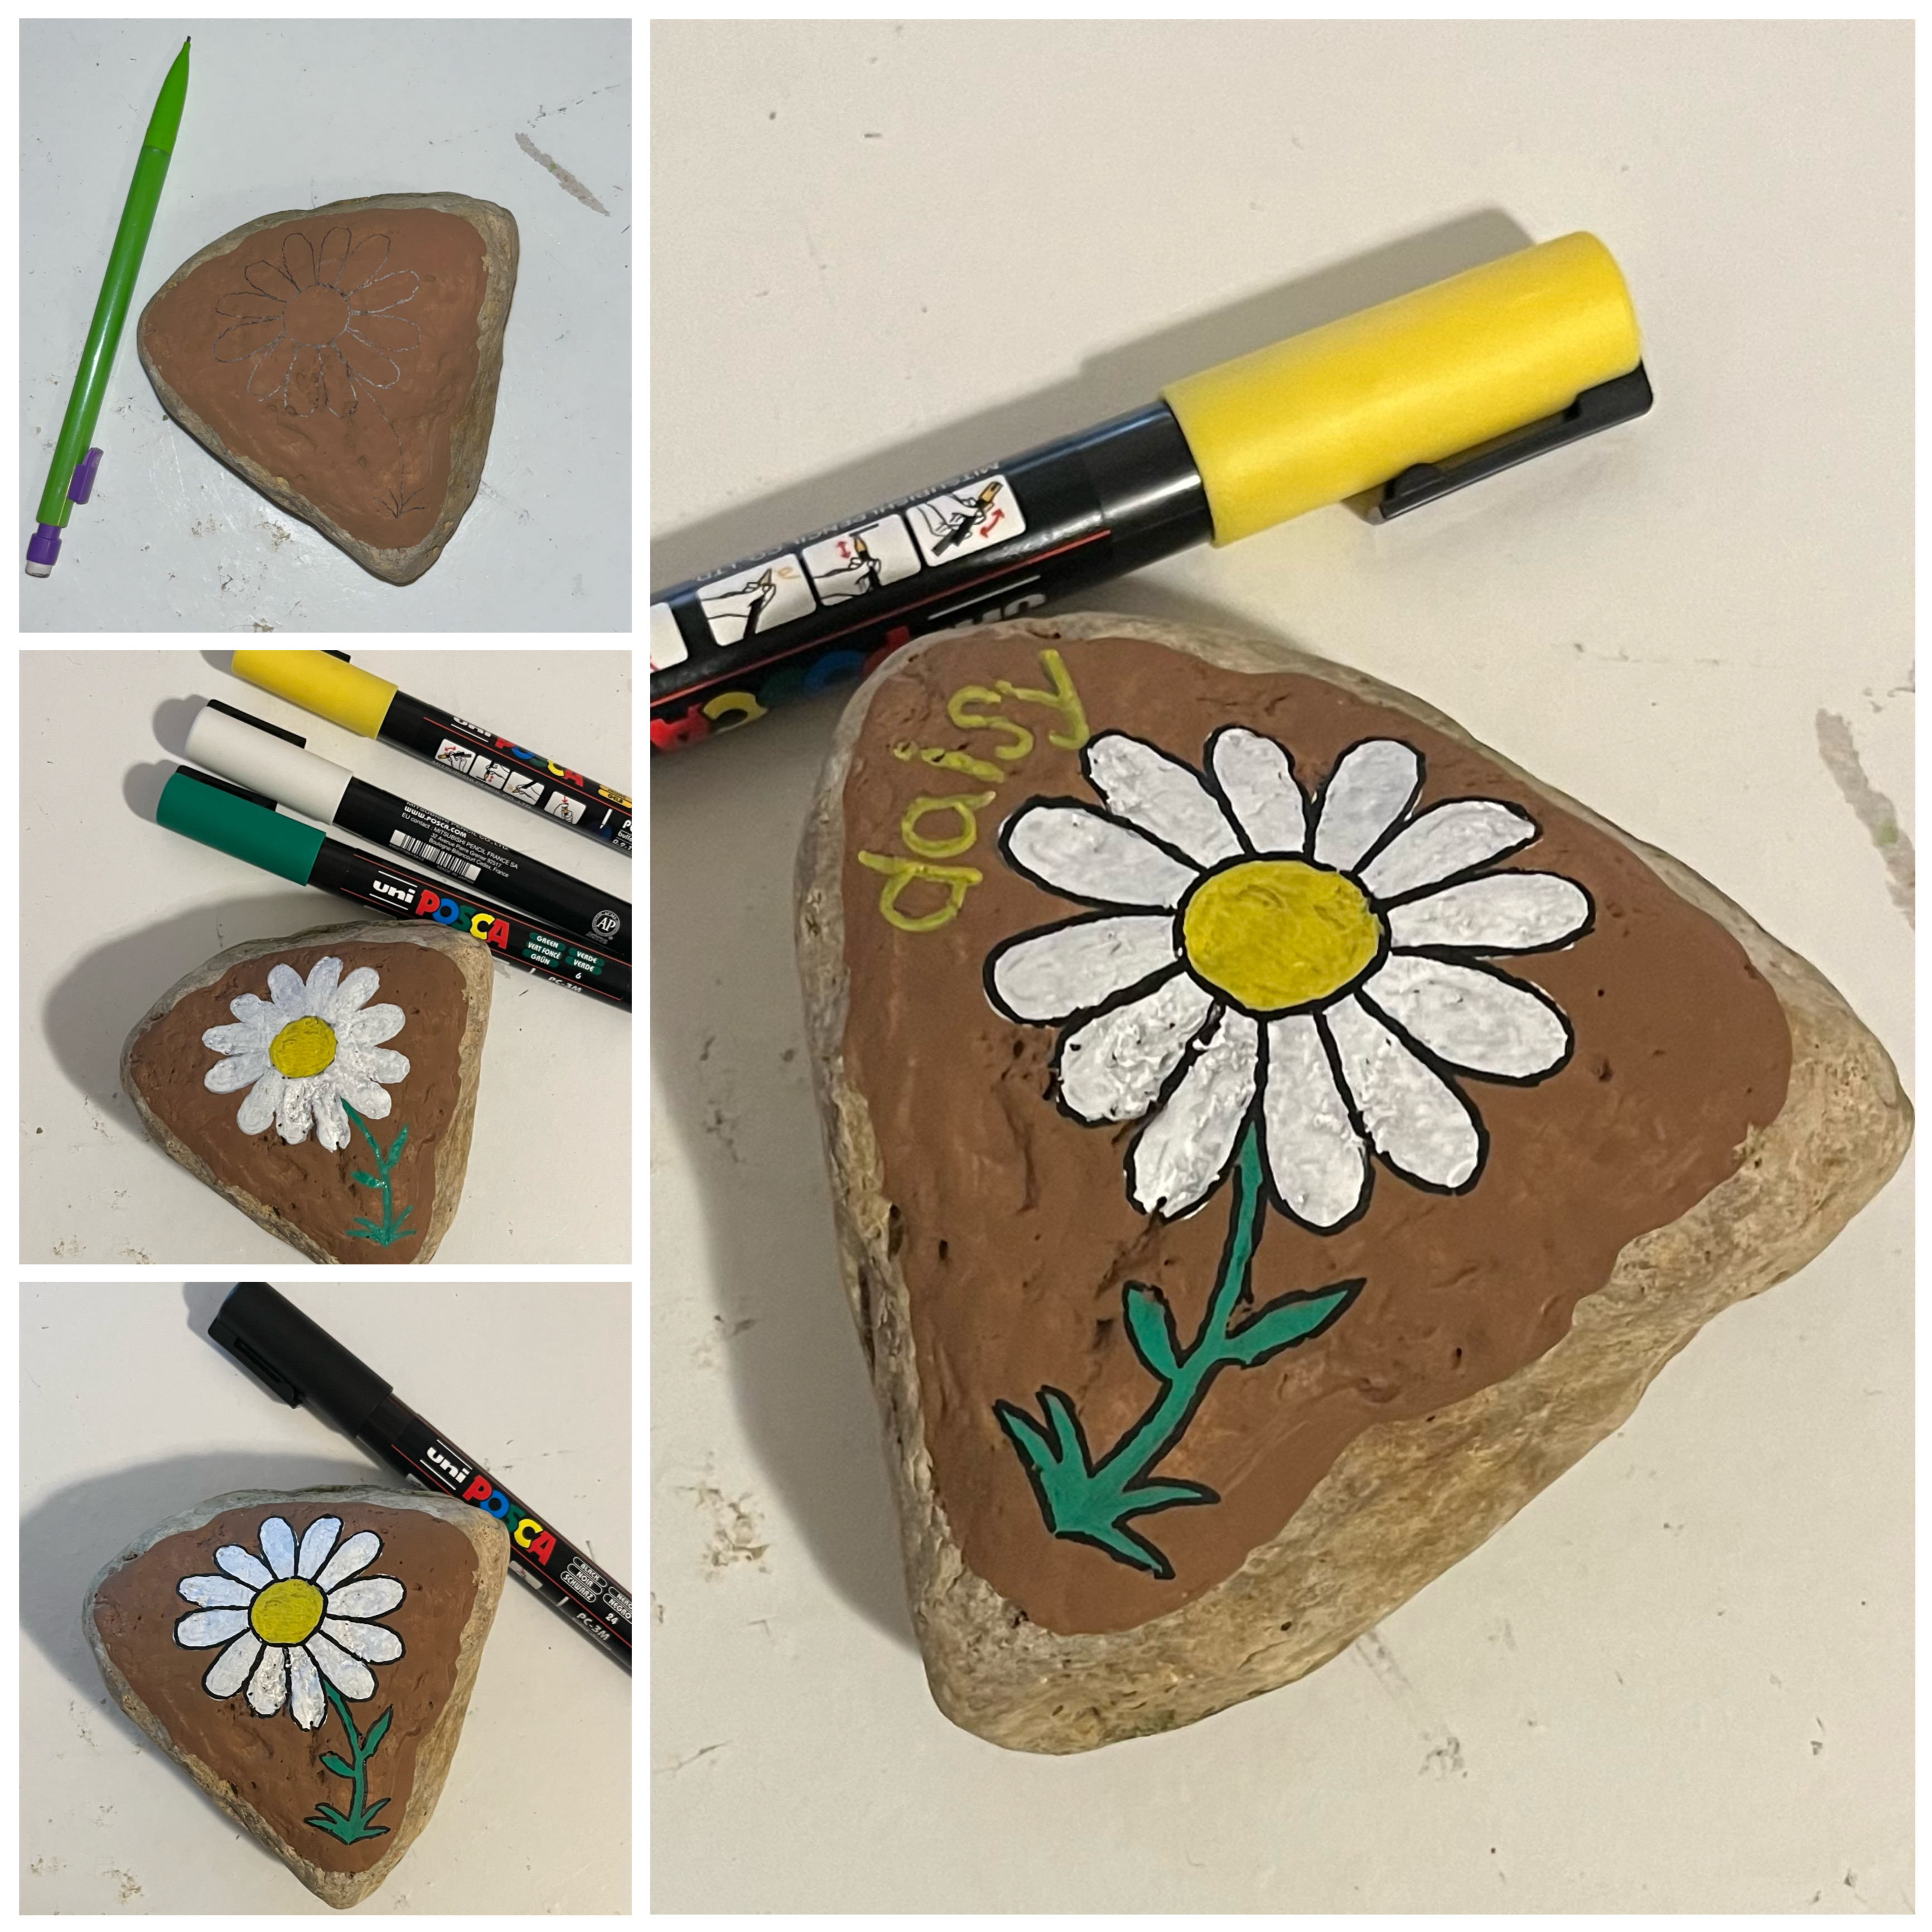 Paint Your Images: Rather than using cut out images, you can use your paint pens to paint your images!
- Print the Name: Print the name of your flower or vegetable using your paint pen.
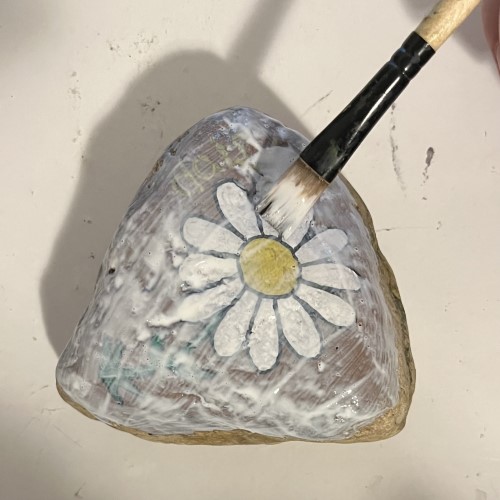 Seal the Image: Apply another layer of Mod Podge over the image to seal it onto the rock. Make sure the edges of the image are fully covered. Allow it to dry completely.
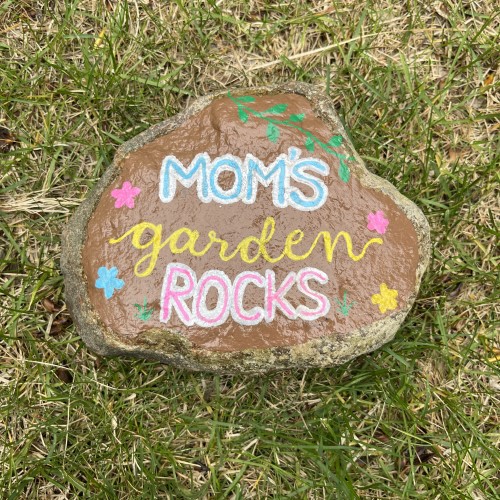 Write the Message: On the larger rock, use your paint pens to write "Mom's Garden Rocks". Be creative and make the message vibrant and cheerful. Let it dry.
- Seal the Rocks: Once everything is dry, spray a layer of clear outdoor sealant on all rocks. This will protect your work and make the rocks weatherproof. Allow the sealant to dry as per the instructions on the can.
- Final Touch: Arrange your rocks in mom's garden as a surprise or present them to her as a lovingly crafted gift.
Voila! You've now created a beautiful, personalized garden decoration that will surely make mom's day. Not only does this "Mom's Garden Rocks" project offer a chance to showcase your creativity, but it also provides a lasting tribute to your mom's green thumb. Don't forget, crafts like these are more than just a one-time project – they're a memory in the making.
Happy rock painting!
Leanne
Print friendly version of these instructions.