DLTK's Crafts for Kids
A Guide to Making Painted Rocks: A Fun-filled Craft for Kids
 As the leader of a Canadian Girl Guides Sparks troop, children aged 5-6, I hold a special place in my heart for the wonder of crafting. Every year, we embark on a delightful, colorful journey that not only fosters creativity and enhances fine motor skills but also plays a significant role in our biggest fundraiser - painted rocks.
Our little adventure starts a few weeks before the grand event, with a field trip to the local river path, collecting the perfect rocks to be transformed into miniature masterpieces. One of the other leaders, who trains dogs for use as seeing eye dogs, usually brings along a canine friend close to graduation as an enjoyable behavior test for the girls and the dog, adding another layer of excitement to our excursion.
With our rocks gathered, we return to our meeting place at the local community center, where each spring, they host a big community garage sale. This is where our troop shines. Thanks to the generous donations of plants and seeds from parents, grandparents, and even my own mom and dad, we create a vibrant, green tableau ready for the sale. A local garden center chips in too, providing terra cotta pots and soil at cost, which we graciously acknowledge with a big thank you sign on our table.
After watering our plants and decorating the pots, we dive into the heart of our project - painting the rocks. This simple, fun activity is accessible to all and can be enjoyed by adults and kids alike. As the Sparks get their hands dirty and their creativity flowing, they create personalized treasures to adorn gardens and parks, or to be gifted to loved ones.
On the big day, our troop, clad in pink, takes to the floor, selling our painted rocks, decorated pots, flourishing plants, and classic Girl Guide cookies. You'd be amazed by how much a flock of 5-year-olds can achieve - we raise enough money to forego door-to-door cookie sales, relying solely on this one Saturday at the community hall.
 In fact, our success has been so notable that the Girl Guides who meet after us have joined in, contributing their own artistic painted pots and rocks. Among their creations, sets of rock garden markers painted like vegetables stand out as a favorite.
 So, grab your paintbrushes, roll up your sleeves, and join us as we dive into the colorful world of rock painting. Whether you're looking for a way to spend quality time with your children or searching for the perfect craft project, painted rocks offer a fantastic opportunity to explore, create, and even give back to your community. Let's get started!
Materials:
- Rocks: Try to find a variety of sizes and shapes. The smoother the surface, the easier it will be to paint. Remember to always respect the environment when collecting rocks.
- Acrylic Paints: They're water-resistant, vibrant, and ideal for rock painting. Get a variety of colors to allow for maximum creativity.
- Paintbrushes: A set with different sizes is perfect. Small ones are great for detailed designs, while larger brushes are useful for covering big surfaces.
- Palette or Mixing Tray: A simple plate will also do.
- Water and Cloth: For cleaning the brushes between colors.
- Protective Cover: Newspaper or plastic tablecloth to protect your working surface.
- Sealant (optional): A clear sealant or mod podge will protect your designs from the elements if you plan to place your rocks outdoors.
- Pencil (optional): If you wish to sketch your designs on the rocks before painting.
- Painting Apron or Old Clothes: To protect against paint splashes.
 Instructions
Follow these steps to create your painted rocks:
- Find Your Rocks: Start an adventure! Go for a walk or hike and find your rocks. Remember, the smoother the surface, the easier it will be to paint. Always respect nature and only take what you're permitted to.
- Prepare Your Rocks: Once you've collected your rocks, it's time to clean them. Wash with warm soapy water and scrub off any dirt or moss. Allow them to dry completely before you start painting.
- Set Up Your Space: Cover your working surface with newspapers or a plastic tablecloth. Lay out your paints, brushes, water, and cloth. Don't forget to put on your painting apron or old clothes to protect against any paint spills.
- Sketch Your Design (Optional): If you prefer, you can lightly sketch your design onto the rock using a pencil. This step isn't necessary, but it can be helpful for complex designs.
 Start Painting: Dip your brush into the paint and start bringing your design to life. You can paint a solid base color first or start directly with the design. Encourage your kids to let their imaginations run wild!
- Let It Dry: Allow your rock to dry completely before adding any additional details or layers of paint. This will prevent the colors from smearing together.
- Add Details: Use smaller brushes to add details, highlights, or outlines to your design. Remember to let each layer dry before adding the next.
- Seal Your Rock (Optional, but highly recommended): If you want your rock to withstand the elements outdoors, apply a clear sealant or mod podge. Allow it to dry completely before handling.
Ideas for Designs
Here are some design ideas to kickstart your creativity:
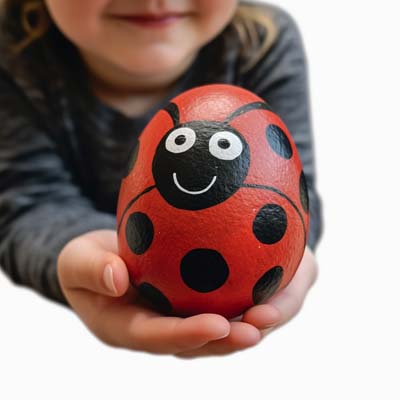
 Animals: Paint your favorite animals on the rocks. Ladybugs, bees, and cats are all great options.
 Nature: Paint elements of nature such as flowers, leaves, trees, or even create a whole landscape on a flat rock.
 - Patterns: Simple shapes and patterns like stripes, dots, and swirls can create a beautiful effect. Try creating a series of rocks with matching patterns in different colors.
 Cacti and Succulents: Paint rocks to look like cacti and nestle them into homemade terra cotta pinch pots.
- Inspirational Words: Paint rocks with words or phrases that inspire you. They can be as simple as "love", "hope", "dream", or even quotes that resonate with you. Painting words can be tougher than some of the other designs, so don't try this one with kids just learning to print. The struggle is judging how much space there is on the rock to print the word. If you do want to try it with younger children, have them draw it on with pencil first or draw it for them.
 Cartoon Characters and faces: Kids will love painting their favorite characters from books, movies, or TV shows.
- Galaxy: Create a mini-universe by painting your rocks to look like a galaxy. Use a mix of blues, purples, blacks, and whites, and dot on stars.
 Seasonal Themes: Tailor your rock designs to the time of year. Think pumpkins for fall, snowflakes for winter, ladybugs for spring, and suns for summer.
- Abstract Art: Let the imagination run wild and create abstract designs with bold colors and shapes.
 Emoji Rocks: Paint rocks to look like popular emojis. This can be a fun way to teach kids about different emotions.
 Garden Markers: If you have a garden, paint rocks to represent different plants and use them as cute, personalized garden markers.
 Garden Markers: Take your garden markers to a whole new level by creating a Mom's Garden Rocks, Dad's Garden Rocks or Our Garden Rocks set of painted stones.
Remember, the goal is to have fun and express creativity. There's no wrong way to paint a rock!
There you have it - a comprehensive guide to creating painted rocks with kids. This engaging, hands-on activity not only offers a fun-filled crafting session but also creates lasting memories. Plus, it gives you and your kids a chance to add a personal touch to your home or garden.
The best part of painted rocks is that they can be as simple or as complex as you want them to be. Even the most straightforward designs can turn out to be the most charming. But, most importantly, it's about the process, not just the end product. So, don't worry about perfection. Just enjoy the time spent with your kids, encouraging their creativity and watching their imaginations soar.
Happy rock painting!
Leanne
Print friendly version of these instructions.