DLTK's Crafts for Kids
Paper Mache Piggy Bank
Hey there, crafty friends! Today, I've got an exciting project lined up for you all. We're going to create a charming homemade piggy bank using paper mache and a balloon as the base. This is not only a fantastic way to have some fun with your kids, but it's also a great opportunity to teach them about the importance of saving money. So, let's dive right into this delightful project and make our very own piggy banks together!
Materials:
- 1 balloon
- tape
- newspaper ripped into strips
- flour
- glue,
- scissors,
- four toilet paper rolls
- one egg carton cup
- masking tape
- pink paint (or red paint and white paint). I prefer acrylic paint, but it will ruin fabric so be careful to wear painting clothes,
- paint brush,
- white paper,
- black marker,
- pink construction paper or cardstock.
- Optional: Googly eyes
Instructions:
 Read the tips to paper
mache for how to make paste and tricks on maching.
Read the tips to paper
mache for how to make paste and tricks on maching.- Blow up one balloon all the way.
- Apply the paper mache: Dip the strips of newspaper or white paper into the paste, making sure they are completely coated. Gently remove excess paste using your fingers and apply the strips to the surface of the balloon. Cover the entire balloon, leaving a small area around the knot uncovered. Let this first layer dry completely before applying more layers. You'll want to add 3 layers in total and you need to do this all in one sitting -- if you half mache a balloon it will pop when the mache starts to dry.
 Let it dry: Allow the paper mache to dry completely. This may take up to 48 hours, depending on the humidity and temperature in your environment. You can use a fan to speed up the drying process if you live in a humid area.
- Pop and remove the balloon: Carefully pop the balloon with a pin or scissors and gently remove it through the uncovered hole near the knot.
- Cut a coin slot: Use a craft knife to cut a coin slot into the top of your piggy bank. Make sure it's large enough for coins but not too big that they'll fall out. Be cautious when using a sharp knife, and ask an adult for help if needed. (We're going to cut this a second time!)
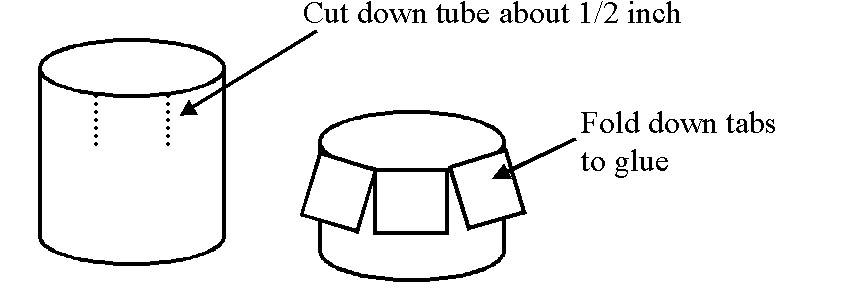
- Optional: Cut a "fringe" on the top 1/3 of all your toilet paper rolls.

 Tape all four of your toilet paper rolls together to form a pedestal and snip off any pieces of fringe that collide with each other. Tape the pedestal to your paper mached balloon. These will be the feet. The toughest part of this project is attaching the legs. I love that his four toilet paper roll legs are close together and paper mached as a unit. This makes a nice sturdy base.
 - Tape an egg carton cup over the hole where the knot of the balloon was. This will be the nose.
- Optional: tape triangles of cardboard for the ears which will get paper mached. Alternatively, you could just attach simple construction paper or cardstock ears after the project is painted.
- Once dry, cover the piggy bank, including the egg carton nose and toilet paper roll legs with 2 more layers of paper mache. I like to use scrap white paper or paper towel for this layer since it's easier to decorate. Don't let the paper mache be too wet or it may start to soak the project and cause it to crush. If this starts to happen, stop, let it dry and then continue.
- Let the project dry completely (12 to 24 hours depending on your humidity level). You can put a fan near it to speed up the drying.
- For a second time, cut your coin slot. Don't make it too big. This might require some adult assistance.
 Paint your piggy bank: Use pink paint or mix your own pink paint using about 2/3 white and 1/3 red paint. Allow the paint to dry completely before proceeding. But remember! This is an artistic endeavour. If your child wants a blue pig, go for it. Or if they want to skip the paint and just leave Mr. Piggy Bank covered in newsprint that's ok too!
- Add the final features: Cut out ears, a spiral tail and eyes (or use googly eyes) from the colored paper or cardstock. Attach them to your piggy bank using glue or tape. Use a black marker to draw the eye middles and nostrils.
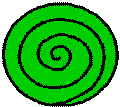
 To make a tail, cut a spiral around a circle of paper or cardstock and glue onto the back. You can see how springy spiral circles work on our springy snake craft.