
Templates version
DLTK's Crafts for Kids
Cherry Tree Paper Craft
I think this simple little craft turned out very cute!
The craft is simple enough for young kids to contribute but still fun for even mom to make (I like doing the tissue paper version but it's tough for preschoolers to make -- the templates are more appropriate for them).
Truth, myth or somewhere in between? What do you think?
I've always wondered if the story is true: "George Washington chopped down the cherry tree when he was a little boy and
then confessed".
I have actually chopped down a tree -- it's REALLY hard, hehe. After half an hour, four blisters and a little blood we managed to get a 6 inch thick spruce tree to
topple over. (Merry Christmas -- we're getting it from Home Depot next year.)
My guess is young George just hit the tree a few times with his axe and damaged it. If it is a true
story, I think I might be more impressed by his tree chopping skills than his honesty!

Tissue paper version
There are a number of variations on this craft depending on which templates you print:
- Template Version (younger children): print the trunk template and the leaves template and paste them together.
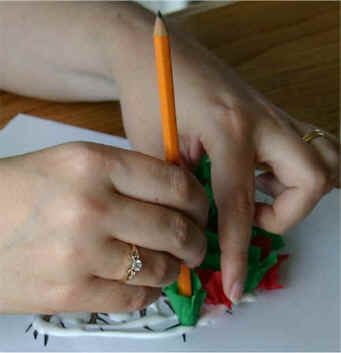
- Tissue Paper Version (older children): cut 1.5 inch squares of tissue paper, wrap around the eraser end of a pencil and glue to the trunk template.
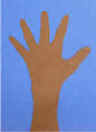
Rather than using the Trunk template, you can decorate a "homemade" trunk (to make the trunk, trace your child's arm from the elbow up, including the fingers)
Materials:
- printer,
- paper,
- scissors,
- glue,
- something to color with (for B&W version and to add grass, sun, etc).
- Tissue Paper Version only - you will also need:
- tissue paper in red and green (about 1/2 a standard sheet of green and 1/4 of red).
- standard pencil with an eraser
Instructions - Template Version:
- Print out the template of choice.
- Color craft pieces if you printed the black and white version of the template. (For a change of pace, try using different mediums than you typically do, such as paints or pastels).
- Cut out the cherries and leaves. This step may require adult assistance.
- We didn't cut out our trunk -- we just decorated the template page with the trunk on it.
- Glue the leaves onto the tree. I like using a glue stick for the template pieces.
- Glue the cherries onto the tree. I like using a glue stick for the template pieces.
- Use crayons, paints or collage materials to further decorate the page (with green tissue paper for grass and white cotton balls for clouds works very nicely!)
Instructions - Tissue Paper Version:
 Print out the trunk or make
one by tracing the child's hand (with finger's spread) and arm about half way up to the elbow.
Print out the trunk or make
one by tracing the child's hand (with finger's spread) and arm about half way up to the elbow.- Color the trunk if using the B&W version. (For a change of pace, try using different mediums than you typically do, such as paints or pastels).
- Cut green and red tissue paper into 1.5 inch squares. We put all our squares in a margarine container so they wouldn't fly around and make a mess when someone walked by our work space.
- Squeeze glue on about 1/4 of the tree (liquid glue works much better than a glue stick for this project)
- Wrap a tissue paper square onto the eraser end of a pencil.
- Place the tissue paper onto the tree by pushing the eraser end of the pencil (wrapped in tissue paper) onto a spot with glue.
- Continue placing squares of tissue paper, mixing the colors, until the tree is nice and full.
- Use crayons, paints or collage materials to further decorate the page ( with green tissue paper for grass and white cotton balls for clouds works very nicely!)
Templates:
- Close the template window after printing to return to this screen.
- Set page margins to zero if you have trouble fitting the template on one page (FILE, PAGE SETUP in most browsers).
Tree Trunk Template (color) or (B&W)
Leaves and Cherries (color) or (B&W)
Print friendly version of these instructions