DLTK's Crafts for Kids
D, L, T & K Build a Bunk Bed!
Part 3
[ Main ] [ History ] [ Advantages ] [ Build It ] [ Decorate It ]
How to Build a Bunk Bed (with children)
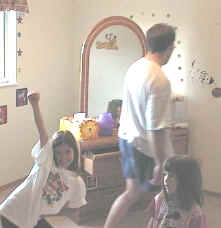
Note: Tasha is Age 7 and Kaitlyn is Age 3
Step 1: Go to Grandpa's house and borrow loads of tools -- one needs more than a hammer and a screwdriver to build a bunk bed.
Step 2: Add loads of tools to daddy's birthday wish list -- this was an unexpected by-product of building the bunk bed *grin*.
Step 3: Go to the FamilyFun magazine website (see note at the bottom of this page) and look for links to a printable version of the material list and directions for building the loft bed. (There is also a link to an Adobe Reader version of the instructions near the bottom of the article.) They did a great job on the directions, so I'm not going to regurgitate them all here. I will let you know when we changed things a bit to make it a bunk bed instead of a loft bed, though.
We went to the lumber store three times. I highly recommend you do this if transporting the wood yourself, for a few reasons:
- you can only fit so much wood in a mini-van
- most lumber places will do 2 or so cuts FOR FREE! Choose some of the tough cuts (like the bed board) and have them cut it for you. It's quite wonderful.
- splitting the work into smaller stages helps make the project less daunting.
- we split it into
- steps 1 thru 6,
- steps 7 thru 11 and
- steps 12 thru 13 (12 was by far our hardest step)
We also skipped a number of things:
- we did not buy chalkboard paint or knot sealer -- to this day we don't know what knot sealer is or where one buys it. Mommy didn't want coloured chalk dust all over the floors so vetoed the chalkboard paint.
- we skipped all of the pieces for M (the adjustable book shelves).
- We put the S piece on the inside of the bed instead of the outside (on the
side away from the ladder)
- nearest where Kaitlyn would be sleeping we put on the inside of the bed so if she rolled off she wouldn't somehow end up wedged between the bed and the wall -- this was "worrisome mom's" idea
-
 we build the whole thing "on site". We didn't want
to have to move the bed, fit it through doors or risk banging up
walls.
we build the whole thing "on site". We didn't want
to have to move the bed, fit it through doors or risk banging up
walls. - mommy and daddy moved out the existing furniture.
- Both girls cleaned up toys and garbage that had fallen behind furniture.
- Tasha vacuumed
- Tasha was very helpful in the cutting part. She used the tape measure and pencil (with mommy's supervision) to pre-measure the boards.
- Daddy measured a second time (measure twice, cut once!) and then cut them.
-
 Kaitlyn and Tasha carried them upstairs to the room
 -
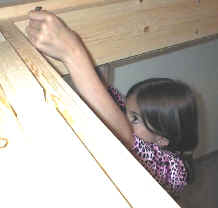
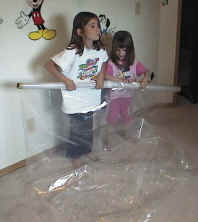
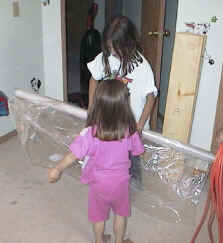 The girls lay plastic down all over the floor
 - everyone worked on hauling bits and pieces of tools and bolts up to the room.
- Kaitlyn was the official "bolt and screw girl"
- to control the girls better, we played "Simon says" for the first day or so until the excitement started to wear off a smidge. "Simon says, Kaitlyn bring 3 screws", "Simon says, Tasha bring the level". That sort of thing kept them from fighting.
-
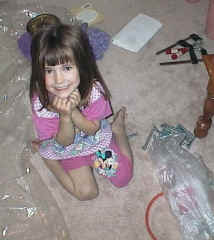
 the bolts, screws and nuts gave Kaitlyn something to play with
during long waits -- excellent sorting practice *grin*
the bolts, screws and nuts gave Kaitlyn something to play with
during long waits -- excellent sorting practice *grin* -
 Tasha was in charge of reading the directions -- every once in
awhile we double checked what she was saying -- like when she told
us we needed the 56 inch screws...
Tasha was in charge of reading the directions -- every once in
awhile we double checked what she was saying -- like when she told
us we needed the 56 inch screws... - daddy drilled bolt holes.
-
 Kaitlyn put the bolts in the holes and tapped them in as far as
she could with a hard soled shoe
Kaitlyn put the bolts in the holes and tapped them in as far as
she could with a hard soled shoe - Tasha finished tapping them in with a hammer
- Tasha put the nuts on the bolts with a socket wrench
- Daddy tightened (but didn't have to very much... The socket wrench gives "strength" to whoever is using it)