DLTK's Crafts for Kids
D, L, T & K Build a Bunk Bed!
Part 4
[ Main ] [ History ] [ Advantages ] [ Build It ] [ Decorate It ]
How to Decorate a Bunk Bed (with children)
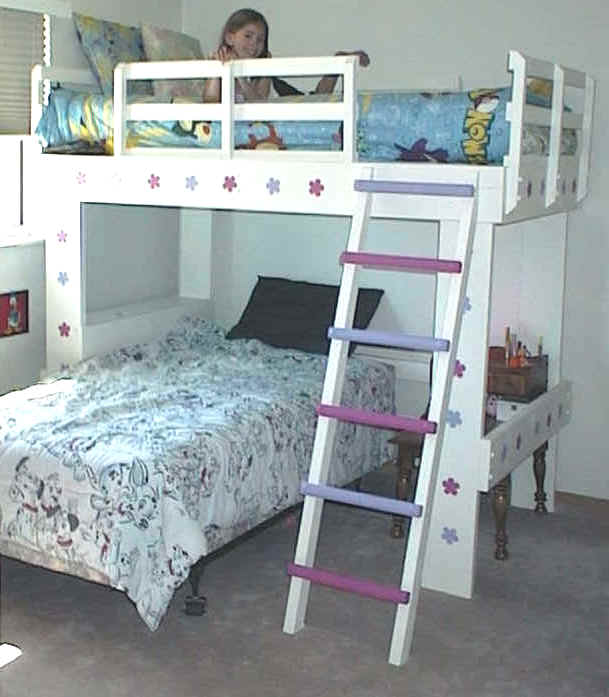
Note: Tasha is Age 7 and Kaitlyn is Age 3
-
 We used leftover primer and wall paint from when we last painted
the girls room. The wall paint was a bit old, so we took it
back to the paint store. They looked at it and said it was
fine to use because it didn't smell. They shook it up for us
which was very nice of them.
We used leftover primer and wall paint from when we last painted
the girls room. The wall paint was a bit old, so we took it
back to the paint store. They looked at it and said it was
fine to use because it didn't smell. They shook it up for us
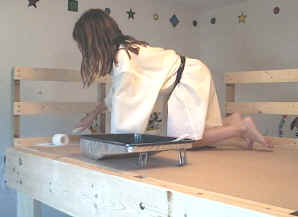
which was very nice of them. - Tasha used a large roller all over the bed. She did most of the painting herself -- she painted herself into a corner on top of the bed, so we had to lift her up over the rail *grin*
- Daddy and I did the ladder and the rails.
-
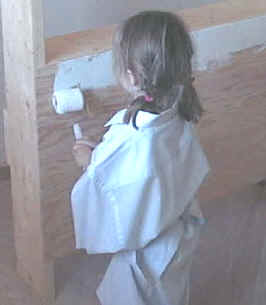 Kaitlyn used a little roller on the lower areas -- I believe it's
typically used for edges. It was the perfect size for her.
Kaitlyn used a little roller on the lower areas -- I believe it's
typically used for edges. It was the perfect size for her.
-
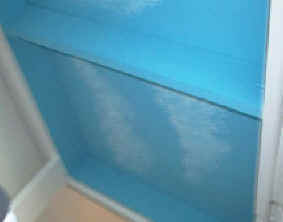 we painted the underneath of the bed blue
 - we sponged on white paint and white mixed with blue paint to make it look like clouds.
-
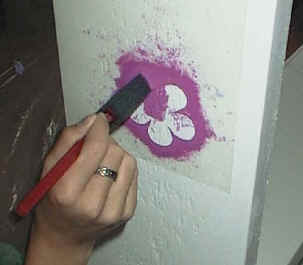 for the flowers, we again used leftover paints we had. You
could also buy small bottles of acrylic paint
for the flowers, we again used leftover paints we had. You
could also buy small bottles of acrylic paint - we used the flower shape from the Simple Shapes and just shrunk it down and traced it onto a piece of transparency paper (clear covers for book reports would work too).
- stencil brushes are expensive. We just used sponge brushes ($1.25 for 5 of them)
- Tasha and Kaitlyn both stencilled. Since the girls were doing it, I used tacky glue (stencil glue) to attach the stencil to the wood -- it makes the stencil sort of like a post it note. You can also just use masking tape, but you have to be a bit more careful than a 3 year old typically is when you dab on the paint. Don't forget that you can remove the wet paint with a damp rag and redo a flower if it doesn't work out.
- We put Kaitlyn's bed and a nightstand underneath
[ Back ]